How to Create a Long Shadow Effect in GIMP
Taufik Nurhidayat
1 min read
#design
#tutorial
Creating a long shadow effect is easier with GIMP. Unlike Photoshop, which is quite complicated, although there are faster ways, for ordinary people, it feels quite complicated.

Creating a long shadow effect is easier with GIMP. Unlike Photoshop, which is quite complicated, although there are faster ways, for ordinary people, it feels quite complicated.
The steps are as follows:
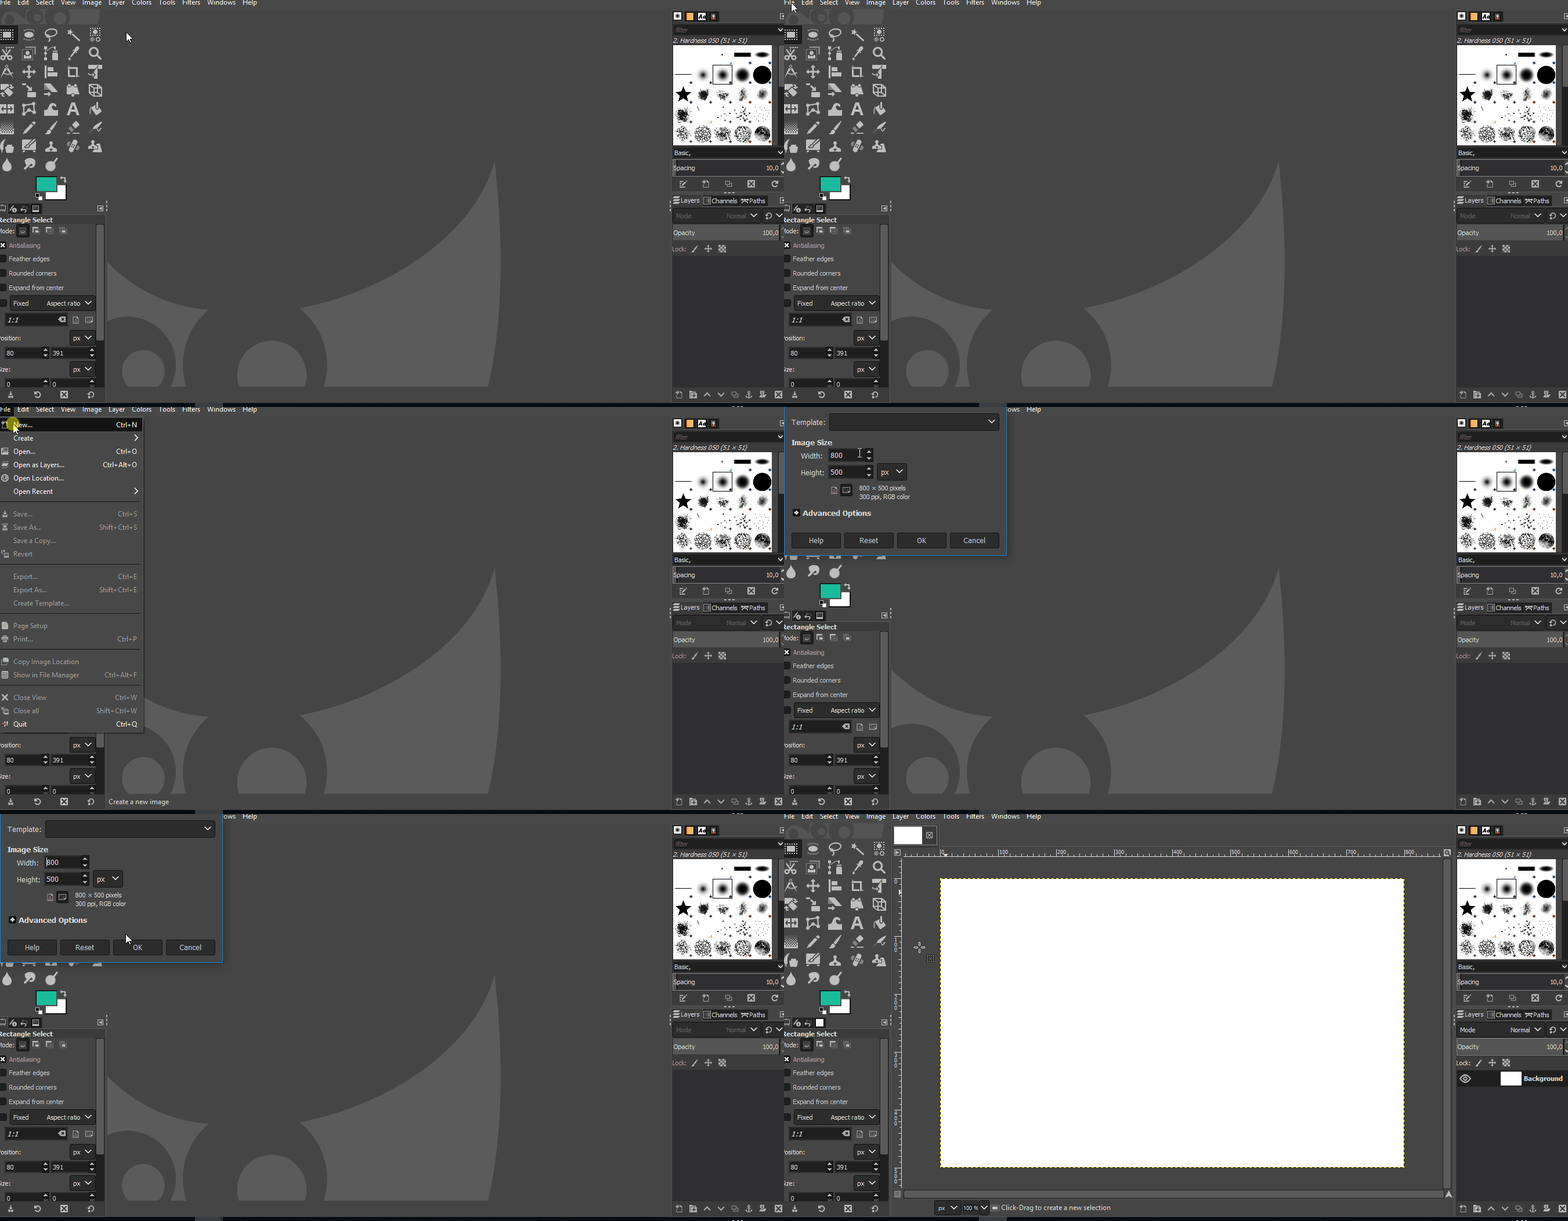
- Open GIMP
- Create a new project.

- Change the color as desired. If you can’t find a suitable color, you can visit flatuicolors.com. Now add text or an icon as desired as the object that will have a long shadow.
![]()
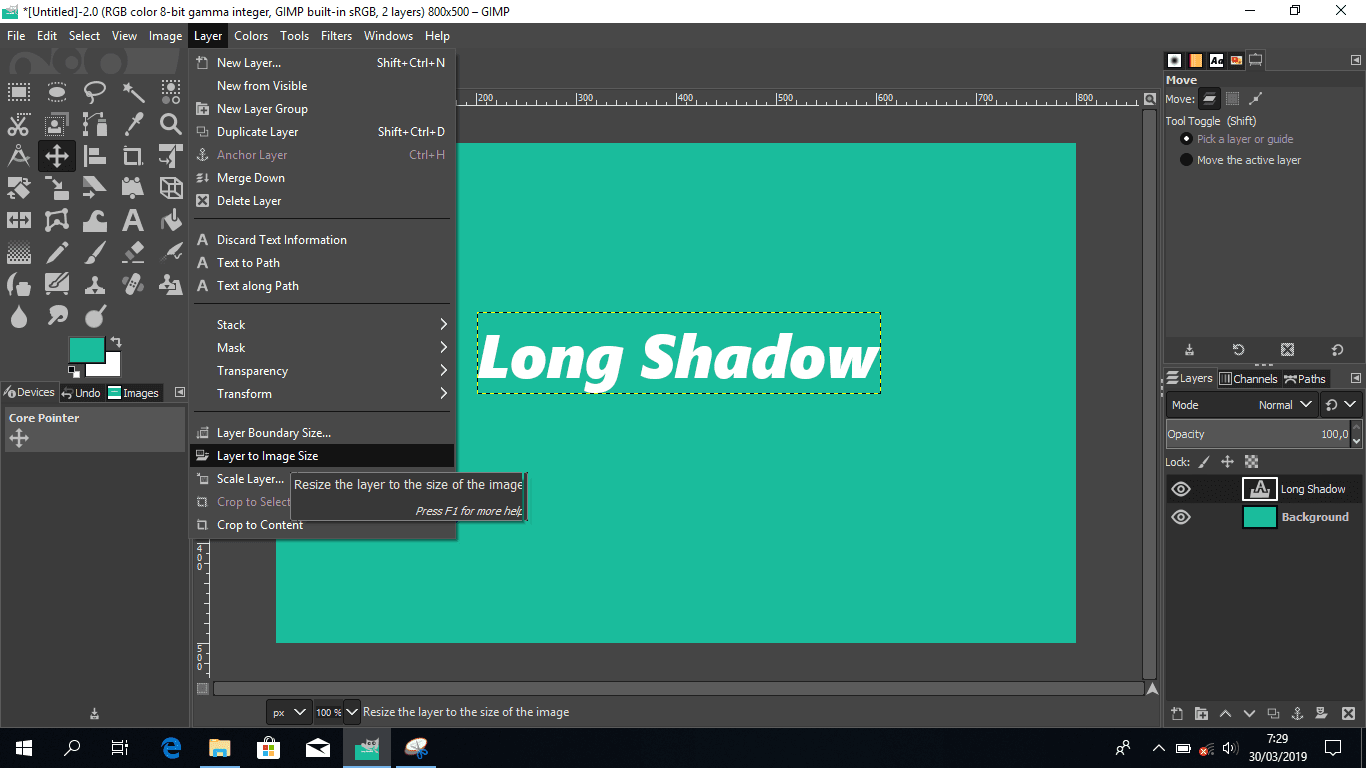
- Now, change the layer to match the size of the canvas. This is so that the long shadow is not cut off by the object layer. To do this, click Layer > Layer to Image Size in the toolbar.

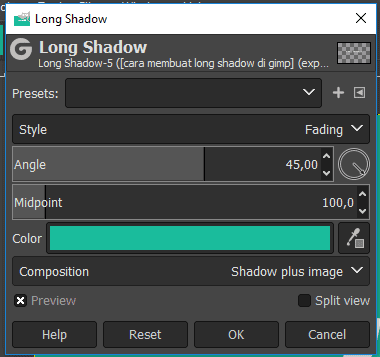
- Now click the object layer that will display the long shadow, click Filter > Light and Shadow > Long Shadow.

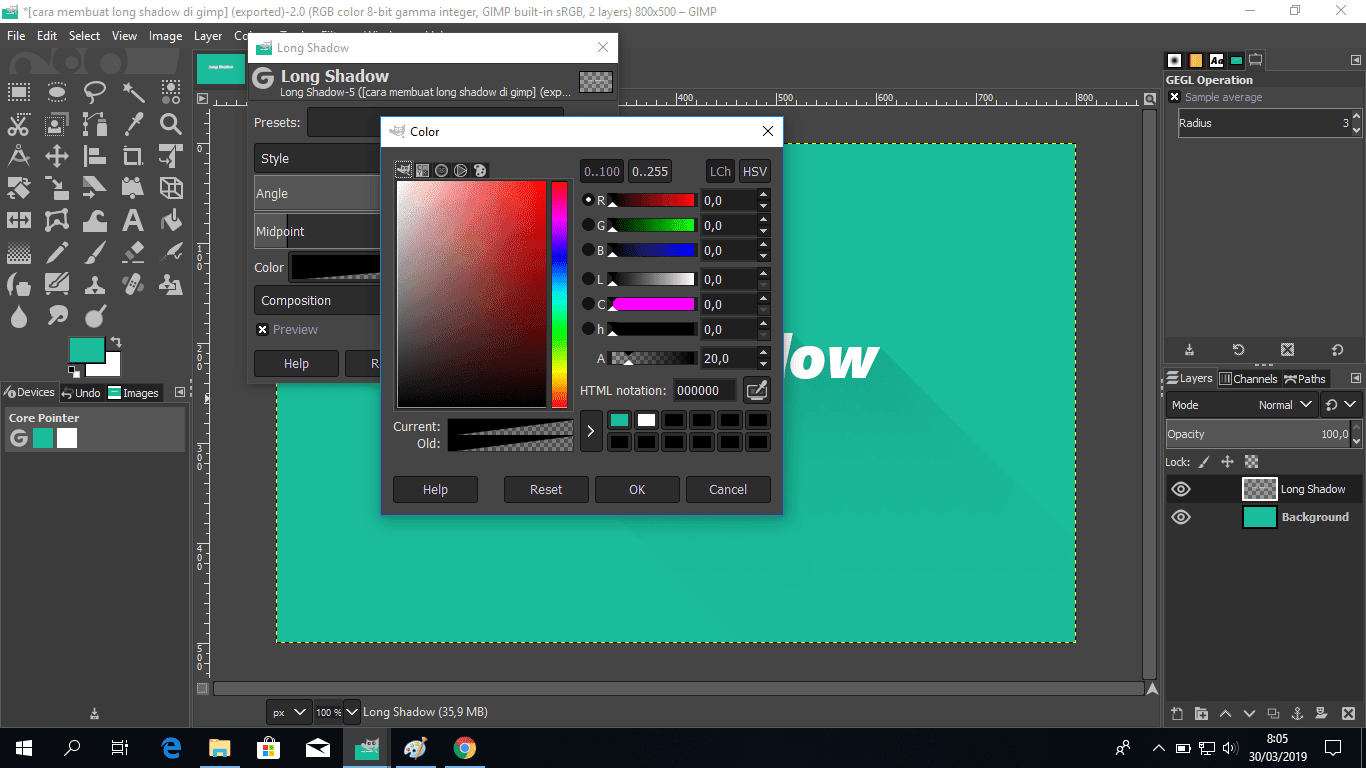
- Add the long shadow, set the style to fading and the color to black with 20% transparency (alpha) or adjust it yourself.

Fading style

Adjust color
Now just save or export the image that has been given the long shadow effect. Here’s the result.

Yes, that’s how to create a long shadow in GIMP. It’s very easy, isn’t it? To create a better long shadow, please be creative yourself.